Using Chef and Capistrano to deploy a Rails application on Ubuntu 16.04
Cloud platforms vs dedicated server
Every developer is looking for a right way to deploy applications to production. Often, the question of the deployment is delayed at a later time, and it’s well known that many applications do not launch in production and developers just use solutions like Heroku for staging or demo servers. Cloud platforms are easy to use, but they are expensive and not so configurable, unlike your own VPS.
Server configurations management
The most popular tools for this which are frequently used in the Ruby world are Chef and Chef Solo.
With Chef you can define the steps required to configure a server to fulfill a “role”, for example a Rails application server or a database server and then apply combinations of these roles to a particular remote machine.
Chef often works centrally. Central server “knows” the role that should be applied to a big number of other servers. If you are upgrading the role, the changes are applied to all of these servers automatically.
But if you don’t need to configure a big number of servers it’s easiser to use our local environment to determine the configuration and server roles, and then manually apply the configuration to the servers. To work with that we need knife-solo.
Adds a handful of commands to chef’s knife tool that aim to make working with chef-solo as powerful as chef-server.
Chef
My typical stack:
- Ubuntu 16.04
- Nginx — the best web server of all time
- Monit — utility for managing and monitoring Unix systems
- PostgreSQL — relational database
- Redis — is a popular in-memory key-value store
- RVM — ruby versions management tool
Let’s create a folder which contains our Chef:
mkdir chef-template
cd chef-template
Next, we have to set up some useful gems with bundler:
Then set up gems and initialize Chef:
bundle install && knife solo init .Generated directory structure:
- cookbooks — directory for Chef cookbooks. This directory will be used for vendor cookbooks and should be added to .gitignore
- data_bags — directory for Chef Data Bags
- nodes — directory for Chef nodes (folder with bunches of roles for each machine)
- roles — directory for Chef roles (groups of used cookbooks and additional attributes)
- site-cookbooks — directory for your custom cookbooks
Install external cookbooks with berkshelf for typical rails stack
berks installMake a base role:
touch roles/base.jsonWhich will contain a run list and some additional attributes.
apt-packages — will be our custom cookbook with some needed libraries:
touch site-cookbooks/apt-packages/recipes/default.rbAlso we need to write two cookbooks to configure monit and nginx which you can copy from my chef-template repo.
Prepare server
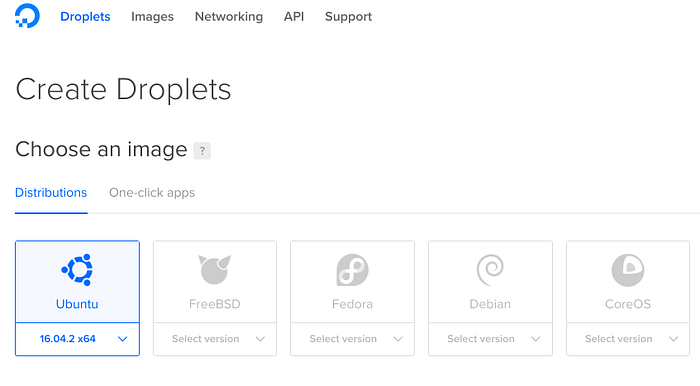
For example, I’m using the most popular cloud server hosting DigitalOcean. Let’s create a droplet with ubuntu 16.04.
The next step is creating node with IP of your machine.
touch nodes/82.196.6.97.jsonAlso update nginx config with your domain or IP, add user and ssh public key.
touch data_bags/users/deployer.jsonInstall Chef on a given host.
bundle exec knife solo prepare root@82.196.6.97 nodes/82.196.6.97.json
Finally, we’re able to upload the current kitchen to the target host and run chef-solo on that host. In a few minutes our config will be applied.
bundle exec knife solo cook root@82.196.6.97 nodes/82.196.6.97.jsonMonit
Web interface with states of monitored processes will be available by /monit route.

Capistrano
Capistrano is a Ruby framework for writing tasks related to deploying any application, in our case a Rails app, to a remote server. This include tasks like release management, checking out the code from a Git repository onto the remote server and uploading configuration files into our app each time when we need it.
As an example, I’ll use my rails-api-template which contains:
- puma — server for Ruby web applications
- dotenv — shim to load environment variables from
.envintoENV - devise_token_auth — token based authentication solution for rails
- rack-cors — support for Cross-Origin Resource Sharing for Rack compatible web applications
Move to your project folder and add Capistrano with some useful gems to the development group into Gemfile.
gem ‘capistrano’,         ‘~> 3.7.2’
gem ‘capistrano-rails’,   ‘~> 1.1.6’, require: false
gem ‘capistrano-bundler’, ‘~> 1.1.4’, require: false
gem ‘rvm1-capistrano3’,   ‘~> 1.4.0’, require: false
Install gems and generate Capistrano configs:
bundle install && cap install STAGES=productionCapistrano gems should be required to Capfile.
We can point the machine’s IP, folder to deploy and a Git branch in config/deploy/production.rb
Puma config:
Note: app_path should be same as in nginx config
File with deploy tasks— config/deploy.rb
We need to create .env.production file to add ENV variables
touch .env.productionInitialize folder on a server and upload configs by following two commands:
cap production deploy
cap production deploy:upload_configs
Finally run deploy command.
cap production deployReady to use templates
By the way, Chef and Capistrano configurations from this article are available in public repositories on GitHub.